
A Step-by-Step Guide to Creating Stunning Flower Drawings
Drawing flowers is a creative and beautiful art. Artists make flowers look pretty on paper, canvas, or the computer using different techniques. People like to draw flowers because there are many types to get inspired by, and it's not just for experts; even beginners can do it.
Following step-by-step instructions is important because it helps you get better at drawing flowers. Here's why it matters:
1. Learning the basics: Beginners start with simple things and then learn more complicated stuff. Step-by-step helps them understand shapes, forms, shading, and colors.
2. Better learning: It's like following a recipe. Artists can understand and practice each part of the drawing, making learning easier.
3. Solving problems: Detailed instructions help with common problems
like making petals look real, showing how light hits, and mixing colors.
When you draw lovely flowers, it's not just copying nature; it's a way to enjoy how beautiful flowers are in your own artistic style. Here's why it's great:
1. Being creative: Drawing flowers lets you show your own style. Every drawing is special and shows how you see the flower.
2. Feeling good: Drawing flowers can be calming. You can enjoy the details, colors, and shapes from nature.
3. Gifts and decoration: Beautiful flower drawings make nice gifts
and can make your home look pretty by adding a bit of nature's beauty.
What You Need to Draw Flowers:
1. Paper for Drawing: Get a strong and smooth paper for drawing. It should be a bit heavy, so it doesn't get all crinkled or torn when you draw. Good paper helps you control your drawing better and makes it last longer.
2. Drawing Pencils: Buy different pencils for drawing with various hardness levels, like 2H, HB, 2B, 4B, and 6B. These pencils make different shades and textures in your drawings.
3. Eraser: You need a good eraser. Look for a kneaded one or a fine detail eraser. A good eraser fixes mistakes without hurting your paper.
4. Blending Tools: You can use blending stumps or tortillons to make smooth shading and transitions in your drawings. These tools help you make flowers look real.
5. Drawing Surface: Put your paper on a hard surface or a drawing board. It keeps your paper steady while you draw and prevents it from moving around.
6. Pictures to Look At: Find pictures of the flowers you want to
draw. You can use real flowers or photos to make sure you draw them
accurately.
Why Quality Stuff Matters:
Using good materials is important when drawing beautiful flowers for these reasons:
1. Precise and Detailed: Good paper and pencils let you make exact lines and small details. Flowers have delicate parts, and using not-so-good stuff can make it hard to draw them right.
2. Lasts Longer: Better materials can handle erasing and shading without ruining your paper. This is important when you're working on detailed flower drawings that need lots of changes.
3. Lots of Shades: Different pencils and good paper help you make lots of shades, from light to dark. This is important to make your flower drawings look 3D and real.
4. Stays Nice: Using quality stuff means your artwork will look good for a long time. Bad materials might fade or get worse with time, and that's not good for your art.
5. Pro Results: If you want your flower drawings to be in
exhibitions or sell them, using good materials helps you make them look more
pro and polished.
Picking the Flower to Draw:
Choosing the right flower for your drawing is the first important step to make beautiful flower drawings. Here's how to do it:
1. What You Like: Think about what flowers you like. Do you have a favorite? Is there a flower that means a lot to you? Drawing a flower you care about will make drawing more fun and meaningful.
2. Season and Where You Live: Some flowers bloom at different times of the year, and not all are around all the time. Consider what's in season and what's available where you live. Drawing a flower that's in season lets you see it for real.
3. Different Kinds of Flowers: Flowers come in all sorts of shapes and sizes. Some are simple, and some are really detailed. Think about how much detail you want to draw. If you're new, start with easier flowers. If you're experienced, you can try harder ones.
4. Meaning and Symbols: Flowers often have meanings. For example,
roses mean love, and lilies mean purity. If your drawing is for a special
reason, like a gift or to say something, think about what the flower
means.
Tips for Finding Ideas and Pictures:
To help you find ideas and pictures, try these things:
1. Botanical Gardens: Visit gardens with lots of different flowers. They're great for getting ideas and seeing flowers up close.
2. Flower Magazines and Books: Look at magazines and books with pictures of flowers. They're good for getting ideas.
3. Online: Use websites like Pinterest, Instagram, or flower picture websites. You can find lots of flower pictures and drawings to inspire you.
4. Take Your Own Photos: If you can, take your own pictures of flowers in a garden or park. You can get unique angles and lighting to make your drawing special.
5. Study the Flower: Spend time looking at the flower you picked. See how it's built, what colors it has, and any special things about it. Understanding your flower helps you draw it better.
Remember, picking the right flower and getting ideas is a creative and
personal thing. It's important to choose a flower you like, and that'll make
your drawing more enjoyable and impressive.
Before you start drawing, make sure you have everything you need:
- Paper: Get good sketching paper so you can easily erase and fix
mistakes.
- Pencils: Get a set with different hardness, from hard to soft, for
shading.
- Eraser: Use a kneaded eraser to lift lines and make
highlights.
- Picture: Find a clear flower picture to look at while you draw.
Step 1: Pick Your Flower
Choose the flower you want to draw. To start, you might want to pick a simple one like a daisy or a rose.
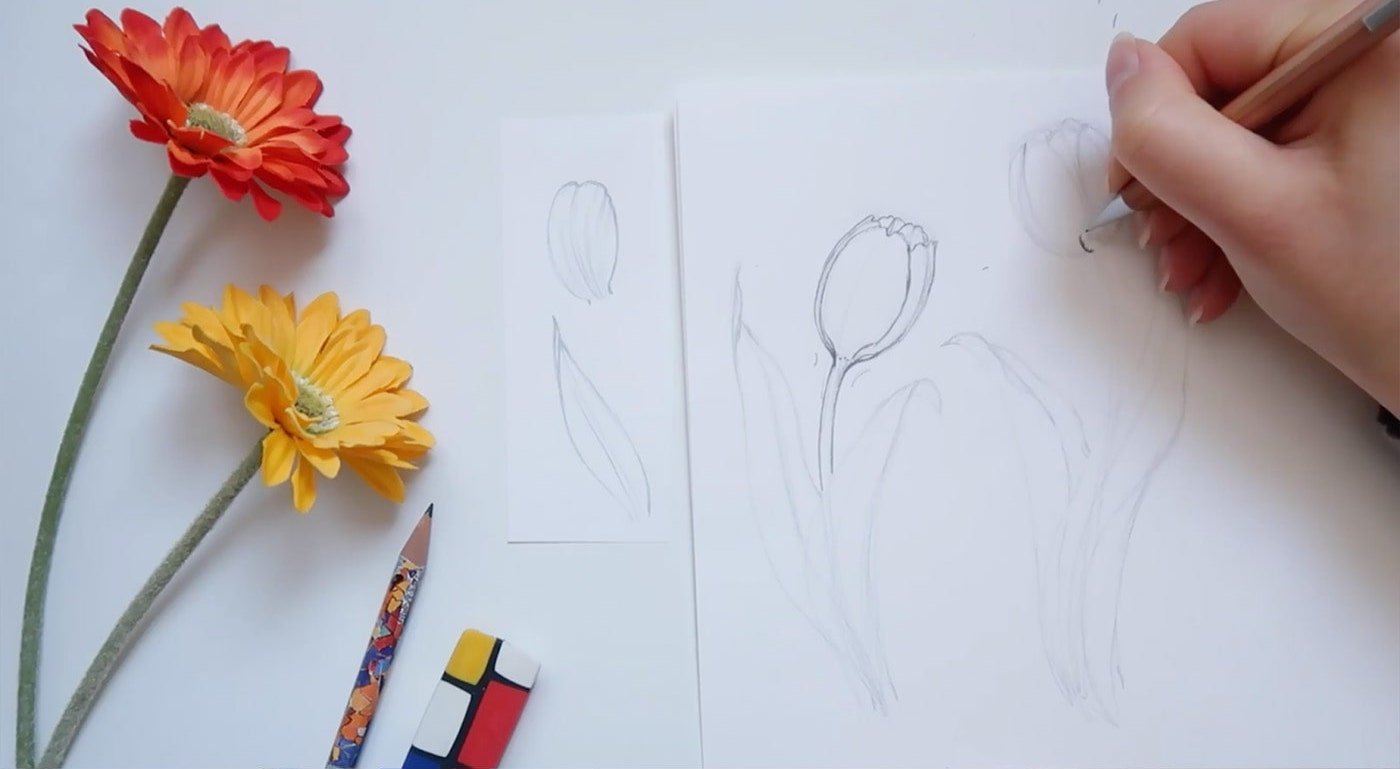
Step 2: Draw Simple Shapes
- Start by drawing the basic shapes of the flower lightly. Flowers can be
made from simple shapes like circles and ovals.
- For example, for a daisy, start with a circle in the middle and ovals for
the petals.
- Make these shapes very light because you'll make them better later.
Step 3: Focus on the Middle
- Look at the middle of the flower. Add details to the circle you drew,
like the stamen and pistil.
- Pay attention to the middle's texture and details, and use light shading to make it look 3D.
Step 4: Draw Petal Outlines
- Slowly work on drawing the outlines of the petals. Look at your picture
to see how the petals look and overlap.
- Start with the outside petals and go inwards.
Step 5: Add Shading
- Use your pencil to add shading and make the petals look 3D. Flowers are not flat, so shading makes your drawing look real.
- Look at where the light comes from in your picture and shade like that. Light parts should be lighter, and shaded parts should be darker.
Step 6: Make It Better
- Keep making your drawing better by adding more details, like veins in the
petals, any tiny marks, and light spots.
- You can use your kneaded eraser to lift out light spots or fix mistakes.
Step 7: Background
- Think about putting something behind your flower to make it stand out. You can keep it simple or make a detailed background, depending on what you like.
Creating Shadows and Texture in Flower Drawings:
Shadows and texture are super important for making your flower drawings look real. Here's how to do it step by step:
Step 1: Understand Light and Dark:
To make your drawing look real, you need to know where the light is and where it's dark on your flower. Look at your picture to see where the light and shadows are.
Step 2: Start with a Light Layer:
Begin by lightly drawing the shape of your flower with a light pencil, like 2H. Then, lightly shade the whole flower with the same pencil. This is your starting point.
Step 3: Make Shadows:
With a slightly darker pencil, like 2B or 4B, start shading the parts that are in the shadows. Look at your picture and copy how dark those areas are. Shade in the direction of the petals and leaves.
Step 4: Blend It Smooth:
Blending is important to make the dark and light parts look smooth. Use blending tools to gently mix the shading. This gets rid of harsh lines and makes it look softer.
Step 5: Make Petals Look Textured:
To give petals texture, make tiny dots with your pencil (stippling) and lines (hatching). Dots mimic the surface of petals, and lines show the texture.
Step 6: Add Texture to Leaves:
For leaves, use lines (hatching and cross-hatching). Cross-hatching is when lines cross, and it makes leaves look veiny. Pay attention to the direction of the lines to show the shape of the leaves.
Step 7: Pay Attention to Details:
As you go along, look at the little things like petal edges, folds, and any tiny marks. Add these details with a sharp pencil.
Step 8: Make Final Changes:
Step back and look at your drawing. If needed, make it better. You might need to darken shadows, lighten the bright parts, or work on textures some more.
Step 9: Pick Your Colors
Choose colors that look good with the flowers you're drawing. Look at real flowers or pictures to find the main colors they have. You can use a color wheel to help you pick colors that go well together.
Step 10: Start with a Base
Begin by putting a layer of color on your flowers. Use gentle, light strokes to slowly build up the colors. This makes it look smooth. If you're using watercolors, start with light layers and let them dry before adding more.
Colors
Step 1: Make Shadows and Depth
To make your flower look 3D, add shading. Look at how light and shadows
fall on your picture and copy it. Use darker colors for the shadow parts and
lighter colors for the brighter parts.
If you're using colored pencils, you can mix colors with a blending tool or your finger. This makes a smooth change between different colors and shades.
Step 3: Add Bright Spots
Put in bright spots on your flower. Find where the light shines on the petals and leaves and use lighter colors or white to make those places stand out. It makes your flower look more 3D.
Step 4: Add Details
The little details, like lines on petals or leaf textures, make your drawing special. Look at these details carefully and draw them just right. You can use a thin pen or pencil to draw petal lines or leaf edges.
Step 5: Think About the Background
Decide if you want to put something behind your flower. A soft, blended background can make your flower stand out more. Just make sure the background doesn't take away from your flower.
Step 6: Make It Perfect
Look at your drawing and fix anything that needs fixing. Add any last details or bright spots to make your flower drawing look great.
Step 7: Sign and Date
When you're happy 😊 with your amazing flower drawing, sign your name and
put the date on it. It shows your progress as an artist.
Remember, making beautiful flower drawings takes practice and being
patient. Don't be scared to try different ways and colors to get the look
you want. With time and effort, you can make wonderful flower art."


